Fitting a 4" Screw Hatch
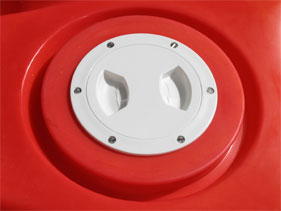
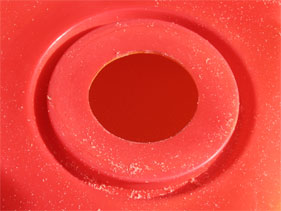
The round hatch mouldings on the Ocean Kayak Malibu II XL allow for several different hatches to be fitted, first option the Gaspachi Round Hatch which we have already fitted to the rear of the kayak, option two a 6" Screw Hatch which can include a mesh bag, finally third option, a smaller 4" Screw Hatch giving access to the front section of the hull, this is the minimum requirement if fitting Scotty Flush Deck Mounts in forward positions.
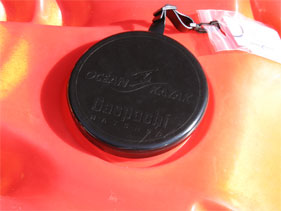
The Gaspachi Hatches are very easy to remove, but a little harder to put back on, as there will be children using the kayak we decided to use a screw hatch in the forward position, harder to undo, easier to do up. Fitting the 4" hatch allows the fitting of a Round Gaspachi Hatch at a later date if required.
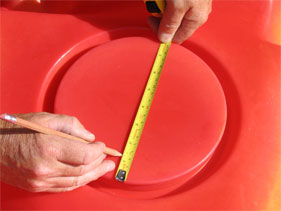
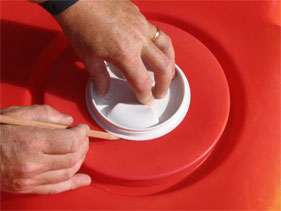
To fit the hatch in the centre of the moulding, unscrew the cover from the Screw Hatch and measure the width of the 4" cover ours measured 118 mm, the Hatch Moulding on the kayak is measured next, this was 204 mm at the widest point. Half the difference between your two measurements. This was 43 mm in our case. Measure and mark (43 mm) from each side of the Hatch Moulding towards the centre.
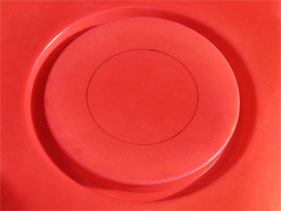
Place the Cover in between the marks; this should align with all the marks when central. When happy draw around the Cover, use a fine permanent marker, this will give a clear key line to follow with the jigsaw.
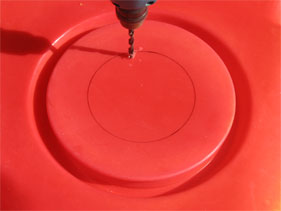
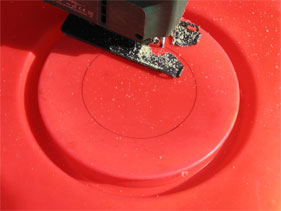
Select a drill bit that is larger than your jigsaw blade; drill a pilot hole close to but within the black key line. Using the jigsaw cut out the hole staying close to the key line. Take care not to cut the jigsaw cable when rotating the saw. Check fit of hatch outer, if required file with round backed file, file right to the line, constant checking for fit is advisable to ensure a tight fit.
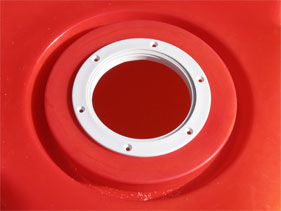
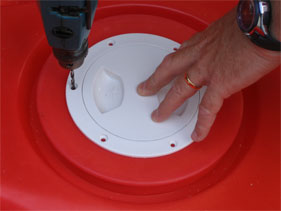
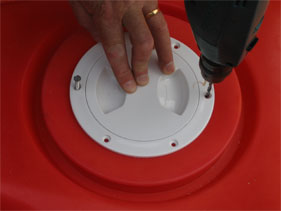
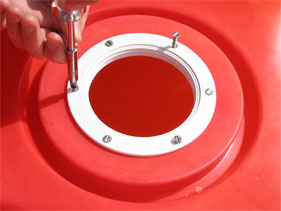
Screw the cover back into the surround until hand tight, position in hole as required, use the screw holes to align, mark the screw hole pointing towards the front seat with a pencil. Hold tight in position and drill the first bolt hole using a 5/32 drill bit, fit a M4 20mm countersunk bolt, drill the opposite side and fit bolt and carry on until all holes are drilled.
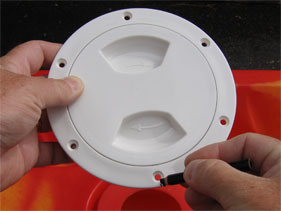
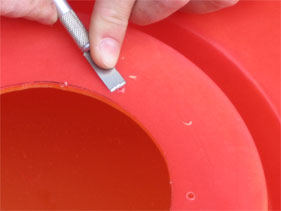
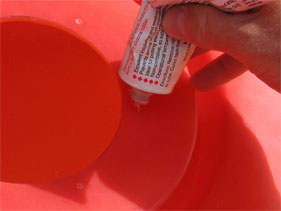
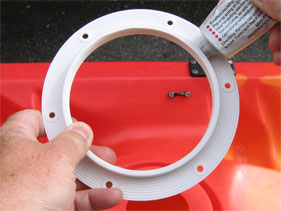
Remove bolts and hatch, clean up the bolt holes with a sharp blade. Apply sealant adhesive directly to each bolt hole. Remove the hatch cover and apply sealant adhesive to the underside of the hatch surround as in the picture below.
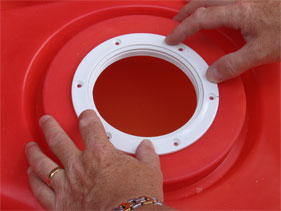
Place surround into cut-out being careful to align the marked hole with the cockpit seat, fit the first bolt and screw down lightly, fit the opposite bolt screw down lightly and then fit all other bolts, fit all nuts and washers finger tight, then tighten opposites using a socket or small spanner and screwdriver to ensure that the sealant is spread evenly under the hatch surround.
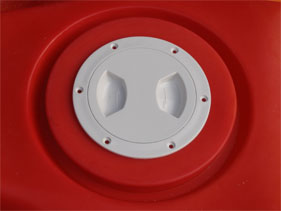
Wipe any access sealant with a wet finger. Fit cover.
Disclaimer:
Installing hardware may cause damage and/or void manufacturer warranties.
The information we provide is a free reference guide only. The author of this information, sponsors and the owners of the website that host this information are not liable for any problems or issues that arise from the use of this information. Users of this information hereby acknowledge that all use of this information is done by their own free will, at their own sole risk, understanding that injury or death could occur.