Mounting the Torqeedo
Now it was time to open the Torqeedo packaging and take a look inside. The box has two layers of polystyrene which protects and presents the Torqeedo parts in a very pleasing manner. Under both layers there is a drybag with shoulder straps which can be used to carry all of the fittings to the beach.
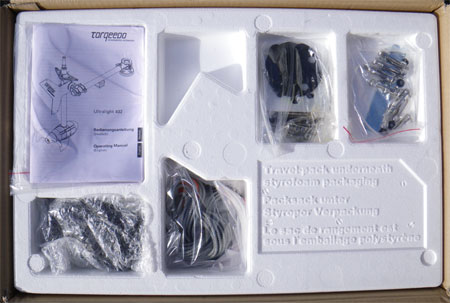
The goodies on the top layer.
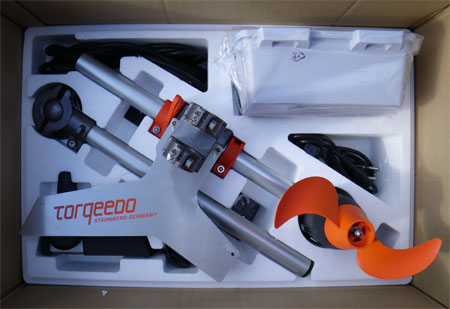
The bottom layer is more exciting.
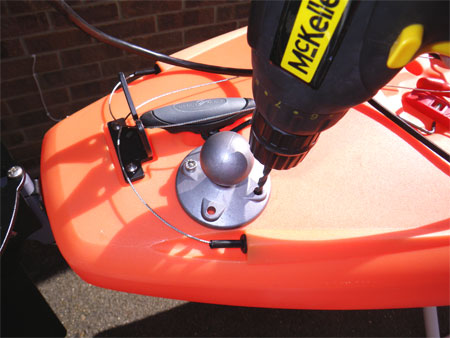
To mount the motor we need to fit the mounting arm, an aluminium boom with a clamp at one end which is mounted on a ball mount similar to that of the RAM system.
The position of the ball mount is quite critical, on the T11 I didn’t have a lot of room to place it and I had to ensure that the motor would not snag against the rudder when under power. I would have preferred that the mounting arm to have been a couple of centimetres longer.
To make positioning a little easier I was able to hold the base of the Torqeedo motor in a work bench, whilst it was attached to the mounting arm which in turn was loosely mounted to the ball mount, I juggled around till the arm was in a horizontal position, the fittings were all clear of the rudder controls and there was still enough room between the rudder and Torqeedo motor, its worth noting at this stage that the motor is very powerful and there will be some forward movement as the propeller forces its way through the water, the mounting arm is also forced downwards due to the considerable power.
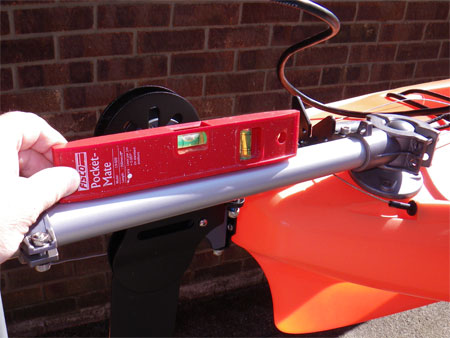
Checking level of the mounting arm prior to fitting.
There are two types of fittings supplied to mount the ball mount, one is using screw anchors, the second the standard nut and bolt system, I chose the latter.
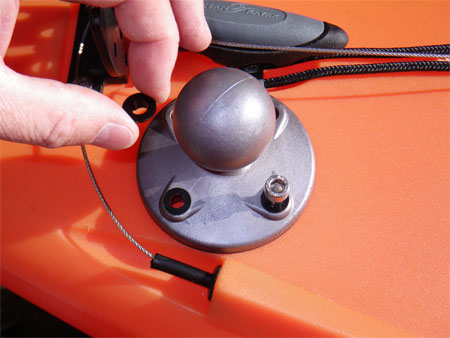
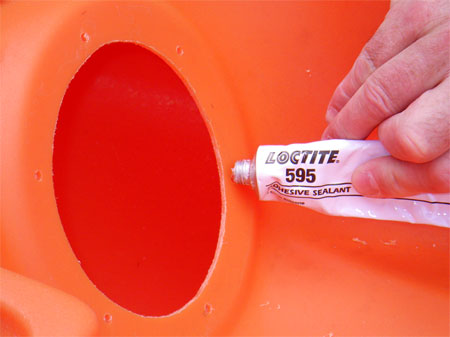
The position of the ball mount was decided and the first hole marked and drilled. I then dropped a bolt into the first hole, repositioned the ball mount and drilled the next hole, dropping a bolt in and repeating until all four bolts were fitted. The ball mount was then removed from the hull. A squirt of Loctite 595 sealant adhesive was squeezed into each of the holes in the deck. The rubber gasket placed over the holes and the ball mount placed on the gasket, each bolt in turn was then screwed into the deck.
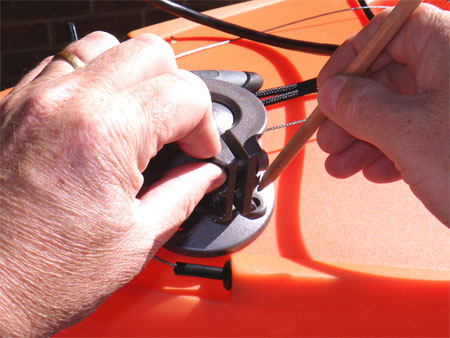
Marking the position of the ball mount for drilling.
Drilling through the mount holes to ensure alignment.
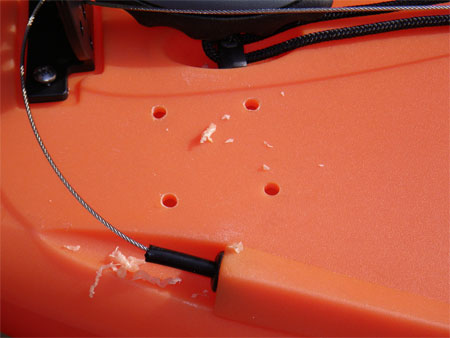
Holes drilled and cleaned.

Ball mount, black sealing plate and white backing plate.
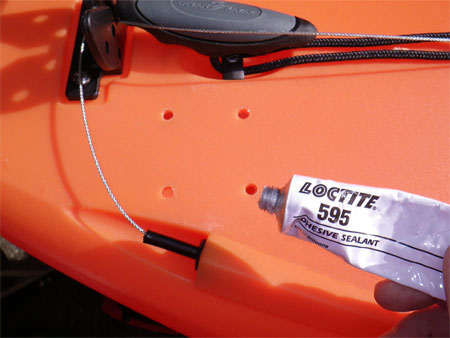
Adding a dab of sealant adhesive to each hole.
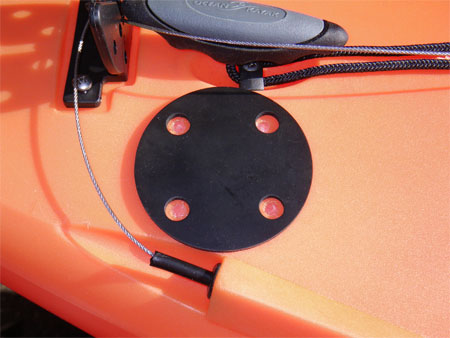
Rubber seal in place.
Inserting the black spacer/washers and bolts.
Inside the hull a polyethylene reinforcing plate was slid over the four protruding bolts, washers and nylon nuts were then fitted and tightened in turn to give a secure fit. All the bolts supplied for fitting the Torqeedo are top quality with Allen Key heads, which means no burred heads, an Allen Key is provided to make things easier.

Finishing the hatch
I had now finished inside the hull, so back to the hatch.
With the lid screwed back into the rim, the hatch was sat into the hole and aligned, the first hole was marked at the top, I then centre punched the mark and drilled the first hole. Using M4 counter sunk bolts I fitted the first one. With the hatch held in place, I continued to drill around the hatch until all the holes were drilled.
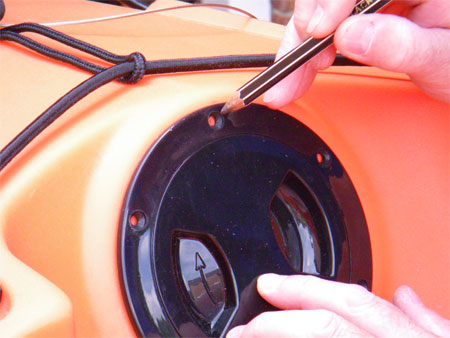
Marking the hatch for drilling.
Pre punching the holes.
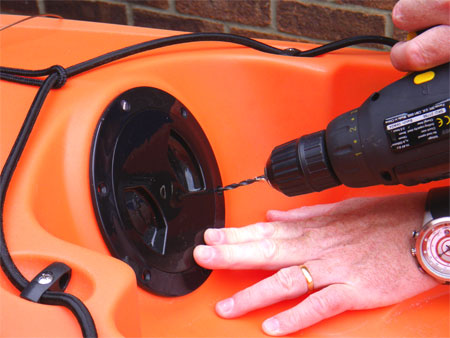
With one bolt in place drilling the other holes.
I then removed the hatch and cleaned up all the holes with a sharp blade.
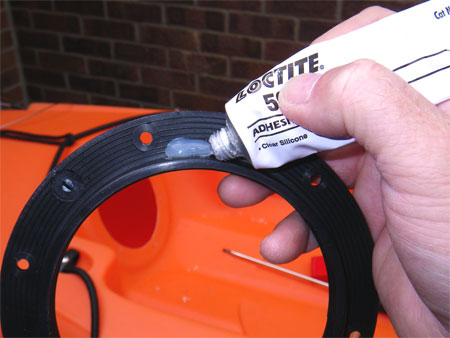
This hatch is likely to get very wet so a good seal is required, I don’t rely on the rubber seal alone, I added a little Loctite 595 to each of the holes and on the inside rim of the hatch, enough so that when the hatch was bolted in position the silicone would ooze from underneath. The hatch was pressed into position and all the bolts tightened with nuts and washers behind. Finally the cover was replaced and any excess sealant wiped away with a wet finger.
More silicone sealant on the drill holes...
... and all around the inside lip of the hatch to ensure a water tight seal.
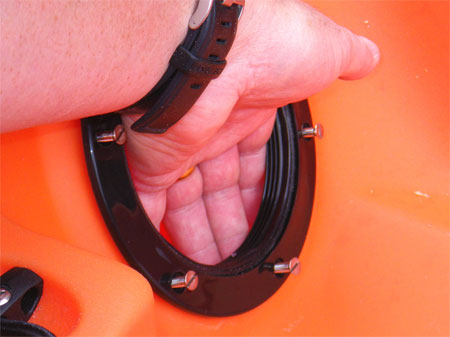
Holding the nuts whilst screwing up tight.
Disclaimer:
Installing hardware may cause damage and/or void manufacturer warranties.
The information we provide is a free reference guide only. The author of this information, sponsors and the owners of the website that host this information are not liable for any problems or issues that arise from the use of this information. Users of this information hereby acknowledge that all use of this information is done by their own free will, at their own sole risk, understanding that injury or death could occur.