Getting Started - Tankwell Hatch
Before I can get stuck into the fit out on the Trident 11 I needed to cut an access hatch in the rear tank well, there is a moulding for this on the rear wall, I had a spare 75mm hatch which is perfect for the job.
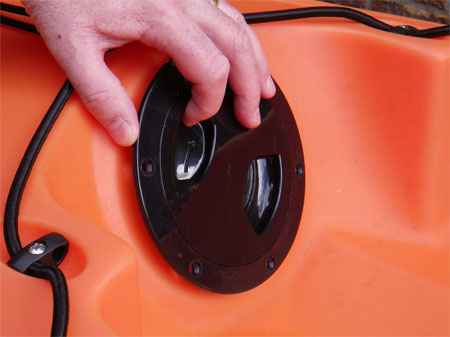
With the aid of my trusty calculator and a tape measure I marked four points around the moulding at the rear of the tank well and having removed the screw in lid I aligned the hatch cover with my marks, and drew around the inside of the hatch opening, these round hatches have the came circumference as the inner lip which makes life much easier.
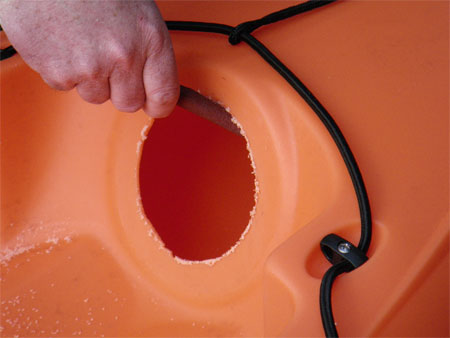
To get the saw started I drilled two holes one top and one bottom to allow my circular saw blade into the hull. Then whizzed around carefully inside the pencil line.
Hand filing.
To finish neatly file with a rounded back file or use a Dremmel, the Dremmel is so much easier and quicker.
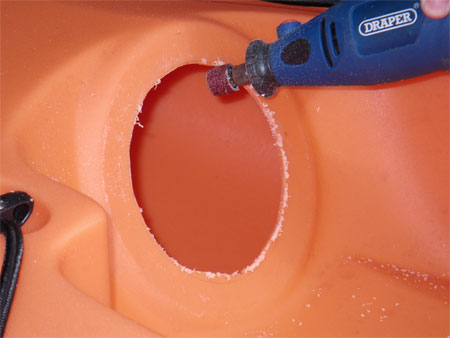
or Dremmel style.
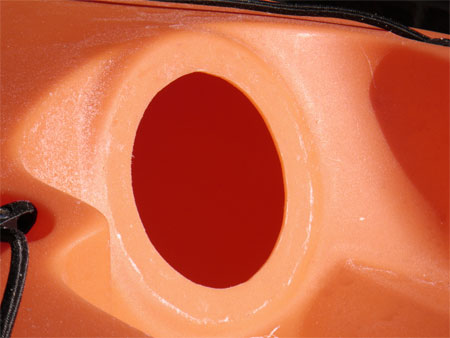
All done.
Next step is to check that the hatch fit’s the hole, thankfully it was a nice snug fit. That’s it for the hatch as I need maximum access to the hull, so made the decision to leave the hatch unfitted till last thing.
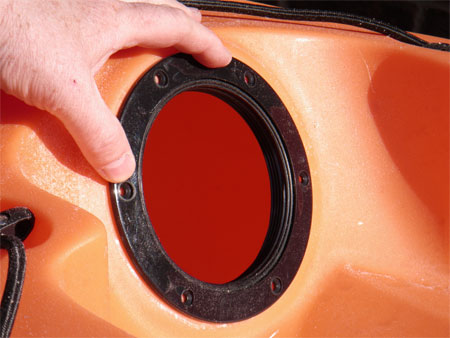
A great fit.
Steering decisions
There are three options when fitting the Torqeedo motor:
- Mount the motor and lock the steering so that you use your paddle to steer.
- Mount the motor and add foot controls and cables steering directly to the Torqeedo, or
- Mount a rudder and foot controls and then mount the Torqeedo behind the rudder and link the Torqeedo controls to the rudder so that both steer, this is the option that we have gone with, giving us the ability to use the T11 without the motor but with a rudder should we so require.
Fitting the Rudder
Now I had access to the hull it was time to fit the rudder control cables.
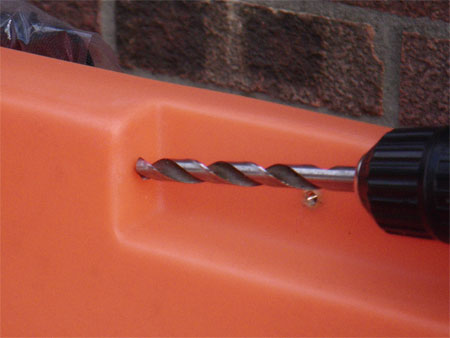
At the stern of the kayak there is a moulding on each side for the rudder control cables to exit. Measuring and marking the centre on each side, I then used a punch to mark centre so that the drill would not slip, there is little room for error when drilling here.
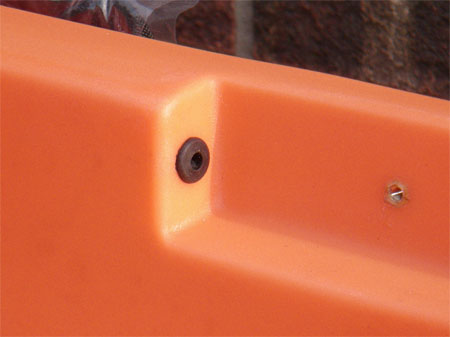
Rudder control rubber grommets.
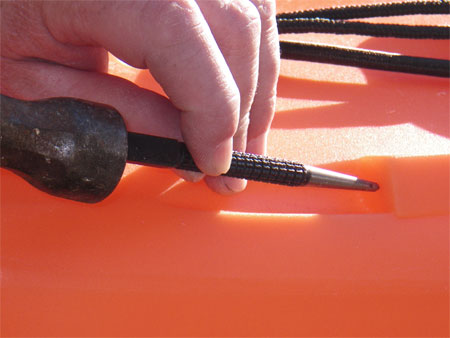
Punching center before drilling.
Using a 3/8" drill bit I drilled both holes, one each side. At this point I fitted the smaller rubber grommets which make the control cables water tight. This is the point when you find out how accurate your drilling was as they are an extremely tight fit which requires some careful, forceful, fiddling to get in position, having access to the inside of the hull through the new hatch made life much simpler.
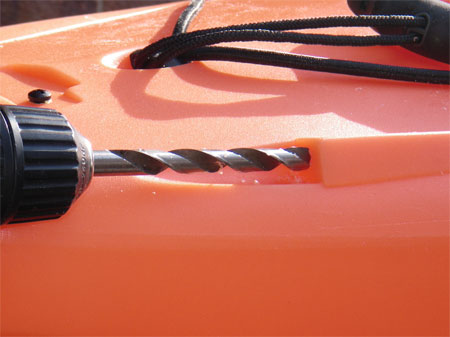
Careful drilling.
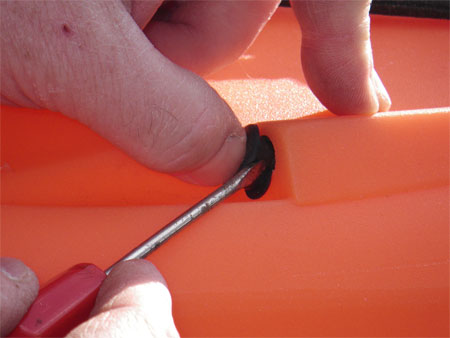
Easing the grommet into place.
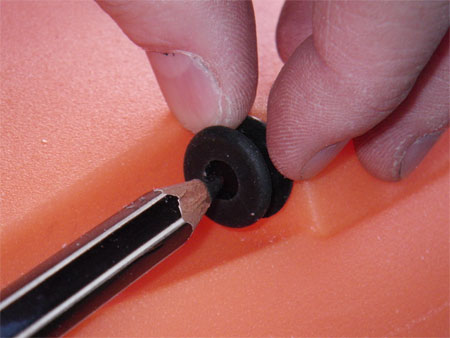
Time to move up to the cockpit and fit the foot controls. The Ocean Kayak Rudder Kit supplied fits several different models and for our T11 the fixing holes in the foot control track only aligned with the front brass insert, a nut and bolt are supplied to drill the kayak and fit using the hole in the track but we decided to drill the track to fit the brass insert towards the rear, it would have proven near impossible to fit a nut to the rear of a drilled hole without the Rod Pod cut out.
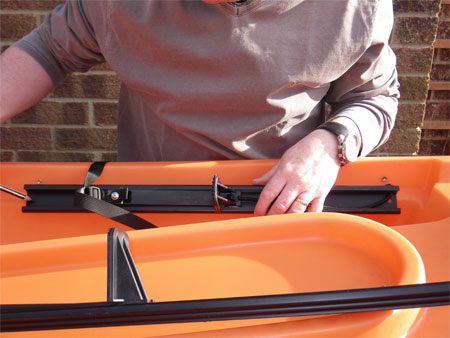
Pencil shows where the hole is required to align with hull fixing.
You can see in the picture that the rudder control (top) is much shorter than the originally fitted foot rest.
With the hole cut in the track and the track bolted to the gunwale we had to mark the area where the control cable would enter the hull. Marking the width of the moulding and central on the track we marked the area to be drilled with a punch, as before to stop the drill from slipping.
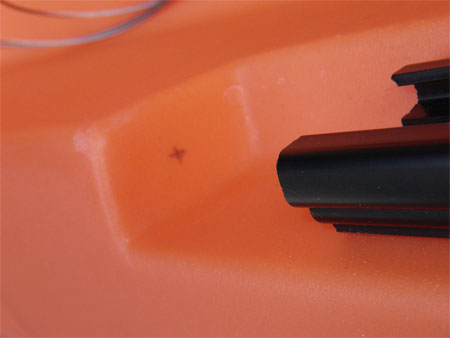
Marked for punching and drilling.
We removed the track and drilled our holes with a 3/8 drill bit, this is a difficult place to get a drill into so we took our time and drilled slowly.
More careful drilling.
As before we now had to fit the rubber grommets, this is trickier still as you don’t have access to the hull from the inside but you do need to ensure that the grommet is seated correctly.

Another grommet.
The more you fit the easier it gets to fit the rubber grommets.
Now its time for the trickiest part of all, fitting the plastic pipe that will protect the rudder control cables. Having a long straight length of wire really helps here, if you don’t have one, then heating up the pipe and try to straighten best you can.
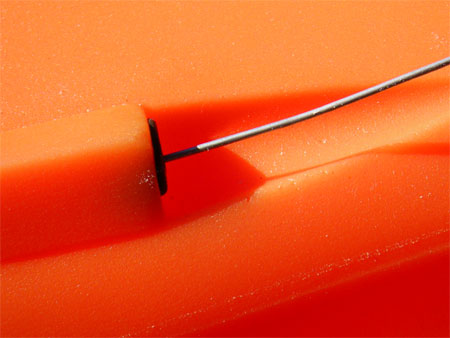
Run your length of wire through the front grommet and ensure that it runs to the side of the scupper moulding in the tank well, you should be able to see through the hull if the sun is out, if not place a torch inside the hull, the wire will show up and you can follow its route, push till its right to the rear of the kayak, stick your hand through the hatch hole and then guide the wire through the rear grommet and out.
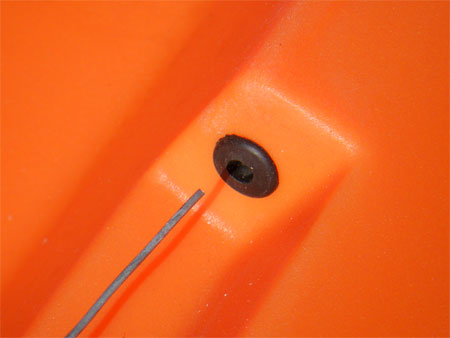
Inserting a length of wire to use as a guide.
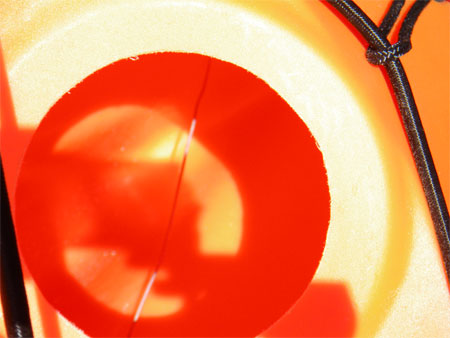
Wire appearing in the tankwell hatch, check that it has run behind the scupper mouldings.
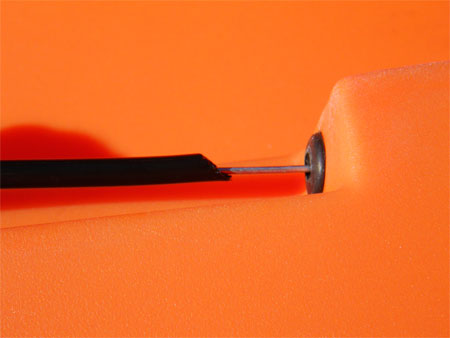
Wire leaving the rear grommet.
Cut the end of the black plastic tubing at an angle with a sharp point, this will make it easier to feed the pipe through the grommets. Smear a little washing up liquid onto the end of the pipe and feed the guiding wire into the plastic tube and start pushing the tube through the grommet, once the washing up liquid lubricates the inside of the grommet things get a little easier and the pipe will start to push through with ease, it makes things easier if you have an extra pair of hands to help with this stage. As the pipe gets to the rear of the kayak it will be easier to push through the rear grommet by hand. Once out, pull out the wire guide, pull the tubing tight and trim each end so that there is 2cm protruding at each end.
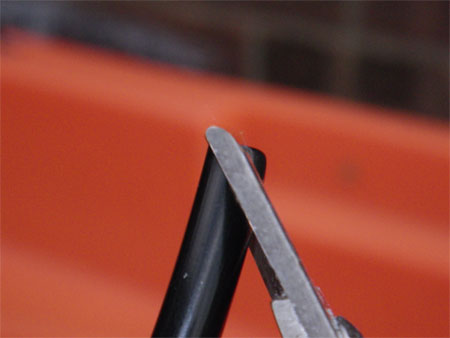
Trimming the tubing at an angle.

Add a smear of washing up liquid.
Sliding the plastic tubing along the guide wire.
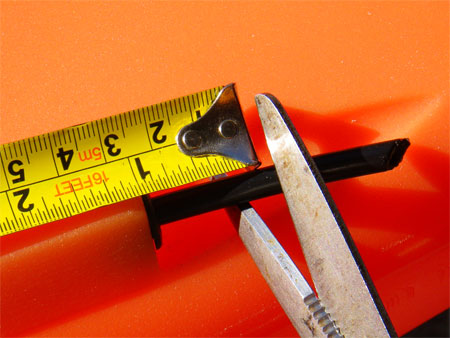
Trimming the ends.
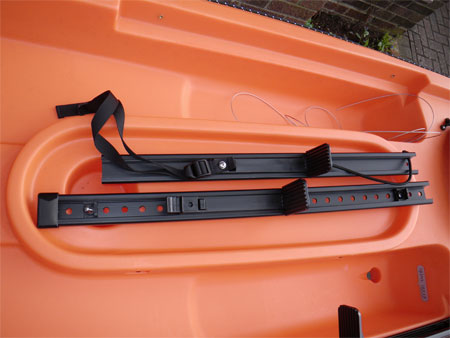
Repeat the process for the other side. The refit the foot control tracks ensuring you use the washer provided with the bolt.
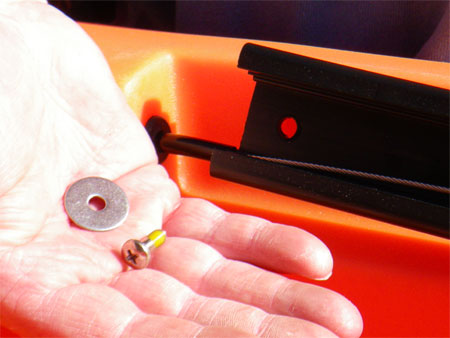
Don't forget the washer .
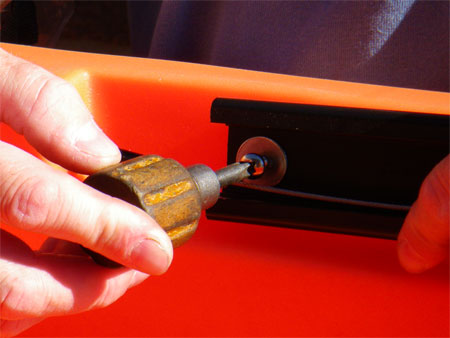
Hand tighten the track .
Both fitted, I bolted on the rear bracket which the rudder bolts too, this is done by removing the 4 black bolts from the stern of the kayak and screwing the bracket back on using the supplied stainless steel fittings, the bracket needs to be fitted with the longer section pointing down, the four holes nearer the top, don’t tighten until all the bolts are fitted as you will need to ensure it is as close to square as possible or the rudder will not hang vertically.
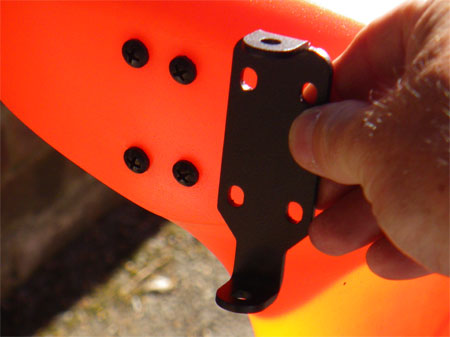
The rudder bracket with black plastic bolts still in place.
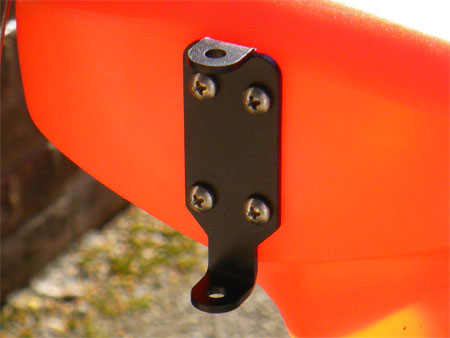
Nasty plastic bolts replaced with nice shiny stainless ones.
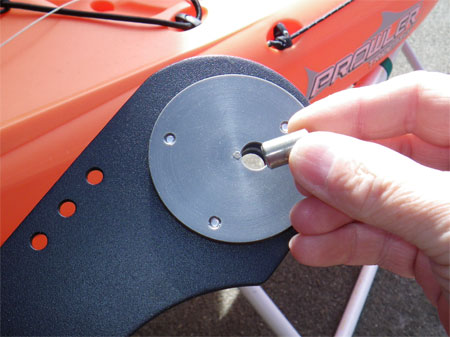
I then fitted the rudder rest, this is used to hold the rudder up on deck when not in use or in transport, fitting is a case of removing the two black bolts from the moulding, placing the bracket with the upright facing forward and rebolting with supplied new stainless bolts.
Once tight the steering head of the rudder can be placed into the bracket, ensuring that all the washers are placed in their right positions on the inside of the bracket to space the rudder correctly. There is no need to do the nyloc nut up just yet.

The Steering head slide onto the bracket.
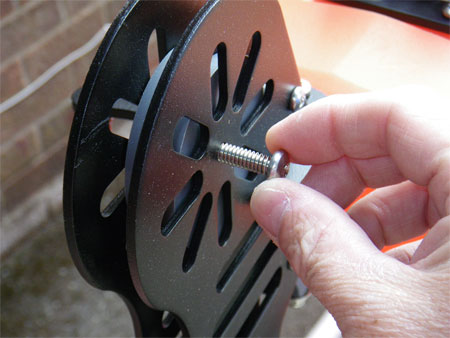
I then removed the bolt, nut and spacer from the top of the steering head. The spacer was then placed in the hole on the rudder blade as shown in the photograph. When fitting the blade to the steering head, the cut out shape and holes face to the rear away from the stern of the kayak when the rudder blade is in the down position. The blade was slipped back into the steering head the spacer, now in the rudder blade was aligned with the original hole and the bolt and nylon nut used to hold in place.
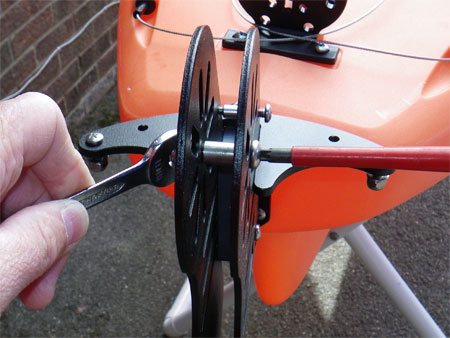
Removing the blade spacer.
And inserting into the rudder blade.
Putting it all back together.
Now with the blade in place you can check that the rudder hangs true, either by eye or using a spirit level. I used a combination of both getting the kayak level with a spirit level running across the width of the kayak over the tank well and judging that the blade was upright by eye, using the skeg as my point of alignment.
Disclaimer:
Installing hardware may cause damage and/or void manufacturer warranties.
The information we provide is a free reference guide only. The author of this information, sponsors and the owners of the website that host this information are not liable for any problems or issues that arise from the use of this information. Users of this information hereby acknowledge that all use of this information is done by their own free will, at their own sole risk, understanding that injury or death could occur.