High Visibility Navigation Light - Richie Oliver (Richie)

List of Parts
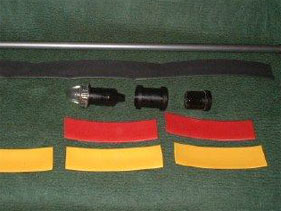
1 x Marley 40mm coupling
1 x Marley 40mm-32mm reducer
3 x 20cm lengths of yellow a shrink tube (available from Tackle shop)
2 x 20cm lengths of red shrink tube
1 x 1m length of black shrink tube
1 x hollow type broomstick handle
1 x battery powered emergency navigation light (available from chandlers)
uPVC pipe adhesive
Assembly
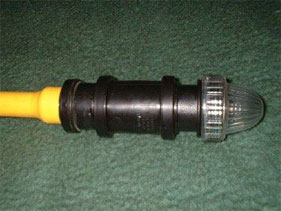
1. Glue the navigation light to one end of the Marley 40mm coupling.
2. Glue the reducer to the opposite end of the coupling.
3. Place the glued unit on the top of the broomstick, but do not glue at this stage.
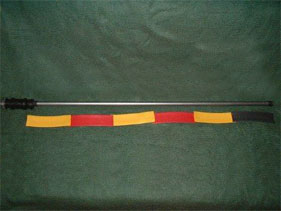
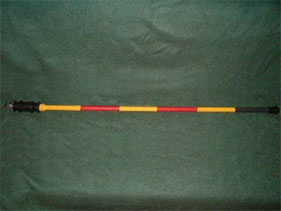
4. Starting from the top, lay out the shrink tube along the length of the broom handle overlapping each joint by 10mm as shown in the picture above.
5. Cut a length of black shrink tube to fit the gap left at base of broom handle.
6. Cut equal length pieces of black shrink tube for where the lamp will connect to the broom handle, these should be a little longer than the base of the lamp unit when in place on the handle. These will be added layer on layer to make the lamp a secure fit on the top of the handle.
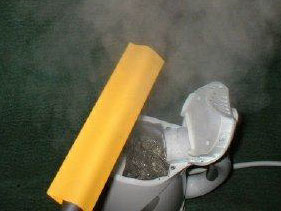
7. Boil a kettle and remove the lid, being careful not to scald yourself on the steam.
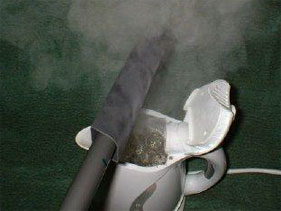
8. Slide one of your small lengths of black shrink tube on the top end of the broom handle and rotate slowly over the boiling kettle until shrunk evenly in place.
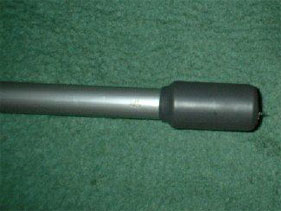
9. Place another section of black shrink tube over the first and continue to add strips of black shrink tube, until the reducer slides on giving a tight fit.
10. At the opposite end of the broom handle, heat and shrink the piece of black shrink tube cut in item 5.
11. Then fit the first piece of yellow shrink tube, overlapping the black by 10mm.
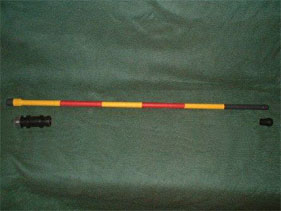
12. Follow with red then yellow and alternate until you reach the top, overlapping each by 10mm.
13. Using the uPVC glue stick the light to the top section.
14. To finish off the bottom section a rod butt was fitted.
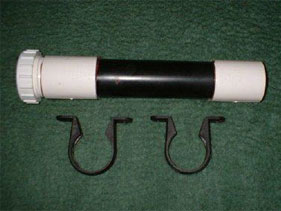
15. Make a holder for the High Visability Navigation Light from a short section of 32mm uPVC pipe, 2 couplings, an inspection cap and some uPVC adhesive. Fix the holder to the crate or cool box with 32mm pipe brackets.
Richie would like to thank Paul Fennell for the inspiration.
Richie Oliver
Disclaimer:
Installing hardware may cause damage and/or void manufacturer warranties. The information we provide is a free reference guide only. The author of this information, sponsors and the owners of the website that host this information are not liable for any problems or issues that arise from the use of this information. Users of this information hereby acknowledge that all use of this information is done by their own free will, at their own sole risk, understanding that injury or death could occur.